Quick Look
Grade Level: 4 (3-5)
Time Required: 2 hours
(four 30-minute sessions, three 45-minute sessions, or two 60-minute sessions)
Expendable Cost/Group: US $0.00
Group Size: 3
Activity Dependency: None
Subject Areas: Algebra, Biology, Computer Science, Physics, Problem Solving, Science and Technology
NGSS Performance Expectations:

| 3-5-ETS1-1 |
| 3-5-ETS1-2 |
| 3-5-ETS1-3 |
Summary
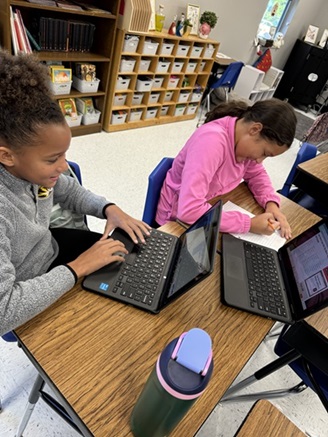
Students explore how the brain enables communication through spoken and written language and how communication is essential for solving problems. Working in groups, students define a problem related to communication, design a solution using a micro:bit, build a prototype, and then test their designs. Possible communication challenges they might tackle are hearing loss, language barriers, or noisy environments. Students follow specific criteria and constraints as they design and build their prototype. After testing their designs and prototypes, students improve their designs as needed. To wrap up, students exchange prototypes with other groups and test each other’s solutions.Engineering Connection
Biomedical engineers develop medical devices, such as hearing aids and cochlear implants, to improve health by restoring or enhancing hearing and communication abilities, particularly for those with hearing loss. They focus on creating advanced, user-friendly devices, often integrating microcontrollers to manage sound amplification, noise filtering, and frequency adjustments. By enabling real-time audio processing, microcontrollers enhance the clarity and customization of sound, significantly improving the user experience for individuals with hearing impairments.
Learning Objectives
After this activity, students should be able to:
- Understand the role of the brain in communication.
- Define a design challenge or problem related to communication.
- Generate and compare multiple solutions.
- Plan and conduct tests to improve a prototype.
- Use a micro:bit to create a communication tool.
Educational Standards
Each TeachEngineering lesson or activity is correlated to one or more K-12 science,
technology, engineering or math (STEM) educational standards.
All 100,000+ K-12 STEM standards covered in TeachEngineering are collected, maintained and packaged by the Achievement Standards Network (ASN),
a project of D2L (www.achievementstandards.org).
In the ASN, standards are hierarchically structured: first by source; e.g., by state; within source by type; e.g., science or mathematics;
within type by subtype, then by grade, etc.
Each TeachEngineering lesson or activity is correlated to one or more K-12 science, technology, engineering or math (STEM) educational standards.
All 100,000+ K-12 STEM standards covered in TeachEngineering are collected, maintained and packaged by the Achievement Standards Network (ASN), a project of D2L (www.achievementstandards.org).
In the ASN, standards are hierarchically structured: first by source; e.g., by state; within source by type; e.g., science or mathematics; within type by subtype, then by grade, etc.
NGSS: Next Generation Science Standards - Science
| NGSS Performance Expectation | ||
|---|---|---|
|
3-5-ETS1-1. Define a simple design problem reflecting a need or a want that includes specified criteria for success and constraints on materials, time, or cost. (Grades 3 - 5) Do you agree with this alignment? |
||
| Click to view other curriculum aligned to this Performance Expectation | ||
| This activity focuses on the following Three Dimensional Learning aspects of NGSS: | ||
| Science & Engineering Practices | Disciplinary Core Ideas | Crosscutting Concepts |
| Define a simple design problem that can be solved through the development of an object, tool, process, or system and includes several criteria for success and constraints on materials, time, or cost. Alignment agreement: | Possible solutions to a problem are limited by available materials and resources (constraints). The success of a designed solution is determined by considering the desired features of a solution (criteria). Different proposals for solutions can be compared on the basis of how well each one meets the specified criteria for success or how well each takes the constraints into account. Alignment agreement: | People's needs and wants change over time, as do their demands for new and improved technologies. Alignment agreement: |
| NGSS Performance Expectation | ||
|---|---|---|
|
3-5-ETS1-2. Generate and compare multiple possible solutions to a problem based on how well each is likely to meet the criteria and constraints of the problem. (Grades 3 - 5) Do you agree with this alignment? |
||
| Click to view other curriculum aligned to this Performance Expectation | ||
| This activity focuses on the following Three Dimensional Learning aspects of NGSS: | ||
| Science & Engineering Practices | Disciplinary Core Ideas | Crosscutting Concepts |
| Generate and compare multiple solutions to a problem based on how well they meet the criteria and constraints of the design problem. Alignment agreement: | Research on a problem should be carried out before beginning to design a solution. Testing a solution involves investigating how well it performs under a range of likely conditions. Alignment agreement: At whatever stage, communicating with peers about proposed solutions is an important part of the design process, and shared ideas can lead to improved designs.Alignment agreement: | Engineers improve existing technologies or develop new ones to increase their benefits, to decrease known risks, and to meet societal demands. Alignment agreement: |
| NGSS Performance Expectation | ||
|---|---|---|
|
3-5-ETS1-3. Plan and carry out fair tests in which variables are controlled and failure points are considered to identify aspects of a model or prototype that can be improved. (Grades 3 - 5) Do you agree with this alignment? |
||
| Click to view other curriculum aligned to this Performance Expectation | ||
| This activity focuses on the following Three Dimensional Learning aspects of NGSS: | ||
| Science & Engineering Practices | Disciplinary Core Ideas | Crosscutting Concepts |
| Plan and conduct an investigation collaboratively to produce data to serve as the basis for evidence, using fair tests in which variables are controlled and the number of trials considered. Alignment agreement: | Tests are often designed to identify failure points or difficulties, which suggest the elements of the design that need to be improved. Alignment agreement: Different solutions need to be tested in order to determine which of them best solves the problem, given the criteria and the constraints.Alignment agreement: | |
Materials List
Each group needs:
- 1-2 micro:bits and accessories (depending on how many you have or can buy)
- 1 micro USB cable
- 2 AAA batteries
- 1 battery holder for micro:bit
- 1 Chromebook or laptop computer
- any supplies the students come up with that they will need to solve their problem (e.g., cardboard, paper, markers, crayons, colored pencils, tape, glue, rubber bands, scissors, craft sticks, plastic cups, plastic containers, foam sheets, LED lights and buzzers, other household materials, etc.)
- writing materials (paper, pens, pencils)
Videos that can support the activity:
- Generation Genius (subscription required)
- What is Engineering?
- Engineering Design Process
- Brain Processing of Senses
- Communication Over Distances
- Information Transfer
- BrainPop (subscription required)
- Engineering and Design Process (Lower level)
- Listening and Speaking
- Engineering Design Process (Higher level)
- Computer Programming
- YouTube
- What’s an Engineer? Crash Course Kids #12.1
- The Engineering Process: Crash Course Kids #12.2
- Defining a Problem: Crash Course Kids #18.1
- Defining Success: Crash Course Kids #18.2
- Got Some Solutions?: Crash Course Kids #26.1
- Try Trials: Crash Course Kids #39.2
- Succeed by Failing: Crash Course Kids #42.1
- Fixing Failure Points: Crash Course Kids #42.2
- Designing a Trial: Crash Course Kids #44.1
- Testing and Trials: Crash Course #44.2
Worksheets and Attachments
Visit [www.teachengineering.org/activities/view/umo-2942-mindful-messages-communication-solutions-activity] to print or download.Pre-Req Knowledge
A basic understanding of how to use block coding and a micro:bit. If the students don’t have this knowledge, there are quick mini lessons that can be taught.
Introduction/Motivation
Today, we're going to start with an interesting discussion about how our brain helps us communicate. Can anyone tell me what happens in our brain when we talk or listen? (Possible answers: "It sends signals to our mouth," "It helps us think of words," "It processes sounds.")
(Have the Mindful Messages Presentation prepared.)
Our brain is a powerful tool that helps us understand and produce language, both spoken and written. For example, when we speak, our brain sends signals to the muscles in our mouth and throat to form words. When we listen, our brain processes the sounds and interprets them as words and sentences. How about reading and writing? What do you think happens in our brain when we do those activities? (Possible answers: "It decodes letters into words," "It helps us understand what we read," "It plans and forms letters.")
Reading involves our brain decoding symbols, or letters, into words and meanings, while writing involves planning and producing those symbols in a coherent way. The brain also helps us understand and use non-verbal communication, such as facial expressions, gestures, and body language. (See Mindful Messages Presentation Slide 4.)
Now, let's talk about why communication is so important. Why do you think communication is essential for solving problems? (Possible answers: "We can share ideas," "We can ask questions," "We can work together to find solutions.")
Communication allows us to share information, ask questions, and collaborate to find solutions. Can you brainstorm some problems people might face when trying to communicate? (Write ideas on the board as students respond. Possible answers: "Difficulty hearing," "Language barriers," "Noisy environments.")
Let’s dive deeper into a few of these. For instance, what challenges do people with hearing impairments face, and how do they overcome them? (Possible answers: "They can't hear well," "They use sign language," "They use hearing aids.")
People with hearing impairments might use sign language or hearing aids to help them communicate. What about language barriers? How do people who speak different languages communicate with each other? (Possible answers: "They use translators," "They learn new languages," "They use translation apps.")
And what about noisy environments? How can we communicate effectively in a loud place? (Possible answers: "Text messaging," "Visual signals," "Noise-canceling technology.") (See Mindful Messages Presentation Slide 5.)
Now, let’s consider these challenges and how technology and creativity can help us solve them. (Write "Communication Challenges and Possible Solutions” on the board, or use Mindful Messages Presentation Slide 6.)
To get started on our project, we will use the micro:bit to design our own communication tools. Think about a specific communication problem and how you can create a device to help solve it. This project is not just about building something, but also about understanding and improving the way we communicate. (Pause to let students reflect.)
Who has a question about how the brain helps us communicate or about the challenges we discussed? (Encourage student questions and write them on the board. Possible questions: "How does sign language work?" "What’s the best way to learn a new language?" "How do hearing aids work?")
Let's explore these ideas as we work on our projects. Remember, real-world engineers start with questions just like yours, and they use their knowledge and creativity to find solutions. I’m excited to see what you come up with! (See Mindful Messages Presentation Slide 7.)
Procedure
Background
Communication and the brain: The brain plays a crucial role in communication, involving several areas that process and produce language. Communication is not limited to verbal interactions; non-verbal communication, such as facial expressions, gestures, and body language, also relies on the brain's interpretation.
Micro:bit: The micro:bit is a pocket-sized, programmable microcontroller designed to make learning and teaching easy and fun. It includes a grid of 25 LEDs that can display messages, two programmable buttons, an accelerometer, a magnetometer, and a Bluetooth antenna. The micro:bit can be programmed using coding languages such Python and JavaScript and platforms such as MakeCode.
Before the Activity
- Review the activity by familiarizing yourself with the objectives, materials needed, and procedure steps. Ensure you understand the purpose of each activity and how they align with the learning objectives.
- Gather materials by collecting all the necessary materials listed in the activity plan, including craft supplies for the prototype and the micro:bits.
- Prepare by setting up the classroom for each activity, ensuring that all materials are organized and easily accessible. It might be good to use tables or put desks together to form groups.
- Consider how to best place your students into groups. Don’t forget to consider factors such as student dynamics and participation.
- If you are unfamiliar with micro:bits, it is recommended that you complete a professional development course such as this one.
Videos you can watch before the activity or during the activity:
- Generation Genius (Subscription required) (See Mindful Messages Presentation Slide 9.)
- What is Engineering?
- Engineering Design Process
- Brain Processing of Senses
- Communication Over Distances
- Information Transfer
- BrainPop (Subscription required)
- Engineering and Design Process (Lower level)
- Listening and Speaking
- Engineering Design Process (Higher level)
- Computer Programming
- YouTube
- What’s an Engineer? Crash Course Kids #12.1
- The Engineering Process: Crash Course Kids #12.2
- Defining a Problem: Crash Course Kids #18.1
- Defining Success: Crash Course Kids #18.2
- Got Some Solutions?: Crash Course Kids #26.1
- Try Trials: Crash Course Kids #39.2
- Succeed by Failing: Crash Course Kids #42.1
- Fixing Failure Points: Crash Course Kids #42.2
- Designing a Trial: Crash Course Kids #44.1
- Testing and Trials: Crash Course #44.2
During the Activity
Day 1
- Go through the Introduction and Motivation section.
- (optional) Show videos at your discretion.
- Give each student a Mindful Messages Worksheet.
Identify the Need & Constraints (10-15 minutes)
- Divide the class into groups of 3-5 students.
- Have a class discussion about what criteria and constraints mean.
- Criteria: Principles or standards by which something may be judged or decided.
- Constraints: Limitations or restrictions.
- Go over the criteria for success. (Note: These are included in their Mindful Messages Worksheet.)
- Functionality: The communication tool must effectively perform its intended function (sending and receiving messages).
- Clarity: The message or signal should be clear and understandable.
- User-Friendliness: The design should be easy to use and interact with, requiring minimal instructions.
- Creativity: The solution should be innovative and demonstrate original thinking in addressing the communication problem.
- Reliability: The prototype should work consistently during tests, without frequent failures.
- Instructions: There must be detailed instructions for another person/group to read to be able to use your device. If you use a code, then that needs to be included as well.
- Go over the constraints that each group will need to consider.
- Materials: Students must use the micro:bit and any other household materials that are within their budget. Some items they may want to use are:
- cardboard
- paper
- markers/crayons/colored pencils
- tape/glue/rubber bands
- scissors
- craft sticks or supplies
- plastic cups or containers
- foam sheets
- LED lights/buzzers
- Time: Students have 2 hours (or 2-3 class periods) to complete the entire project. (You can change this to fit your needs.)
- Budget: Set a price for each item that you would “charge” the students to use, or have them use the actual price. You could give each group a budget of anywhere from $10-$25.
- Group Size: Must have at least 3 students, with a max of 5. (Use this step if you want to let students create their own groups.)
Research the Problem (However long you want to give them; can be anywhere from 10 minutes to 60 minutes.)
- Give students time research their problem using Google and/or other research methods.
- Have students research:
- Background information about their topic/problem.
- What products or solutions already exist.
- Technology is already created that they can use to modify to fit their needs.
- micro:bits and what code or tutorials are already available.
Imagine: Develop Possible Solutions (15-20 minutes, or 45-80 minutes if students are not already familiar with micro:bits)
- Idea Generation:
- Have each group brainstorm multiple solutions (recommend at least three, but they are welcome to do more) to their problem.
- Have groups sketch their ideas and discuss the pros and cons of each.
- Micro:bit Integration:
- Guide students on how they can incorporate the micro:bit into their designs—for example, using the micro:bit to send messages, display text, or create signals. (Note: If this is the first time using the micro:bit, then micro:bit lessons will need to be taught before this activity.)
- This step only needs to be done if it’s your students’ first time using micro:bits. If your students are familiar with micro:bits, skip to Step 12. (30-60 minutes)
- Provide each group with a micro:bit (depending on how many micro:bits you have). If you only have 1-2 for the whole class, then you can skip to the coding part.
- Have your students go to https://makecode.microbit.org to start their first coding project. There are six introductory projects that help your students learn the different features of the micro:bit. It is recommended that they do all six; they don’t take very long to do. If you don’t have the time, you can pick which ones you want to do.
- Once you have coded a project, you will need to download the code to the micro:bit by connecting the micro:bit to the computer with the cable and then clicking the ‘download’ button in MakeCode. If you only have a few micro:bits, have the students take turns trying to download code to the micro:bit.
- MakeCode makes it easier to start off with and create code quickly. If your students are familiar with code, or a couple of students are, you are welcome to let them use Python to do text-based programming.
Plan: Select a Promising Solution (5-10 minutes)
- Have students make a plan. (Note: For many teams, this can be the hardest step.)
- Tell students to revisit their needs, constraints, criteria, and research from the earlier steps, compare their best ideas, select one solution, and make a plan to move forward with it.
- Have students make a list of supplies and materials they will need.
- Have students draw a diagram of what they are going to build and label it with what supplies it will be made from.
Day 2
Create: Build a Prototype (40-60 minutes)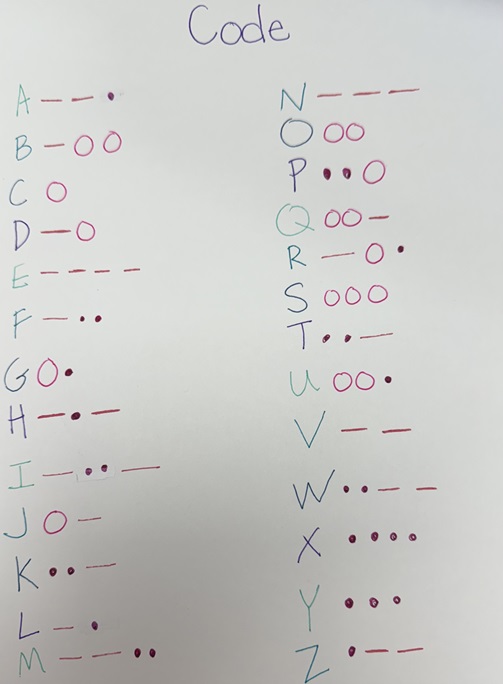
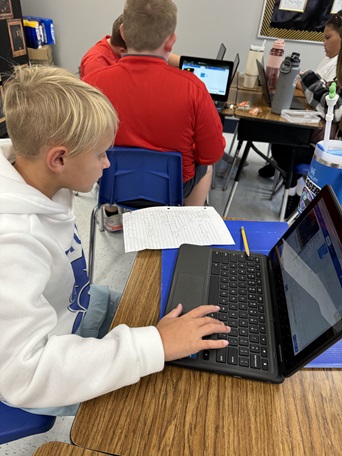

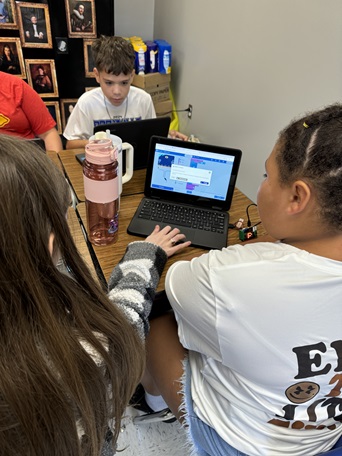
- Construction: Give groups time to build their prototypes using the micro:bit and other materials that they “purchased” for their design.
- Programming: Have students program their micro:bit to perform the necessary functions for their communication tool. (Note: Because the website to code is free, each student can be coding the same thing, or they can be coding different things or solutions.)
- Instructions: Have students create easy-to-understand instructions on how to use their prototype.
Test and Evaluate Prototype (2-3 minutes each time it is tested)
- Testing: Give groups time to test their prototypes and record the results. Remind students to consider variables that could affect their designs. (Note: Make sure students have clear directions for someone else to test their design.)
Improve: Redesign as Needed (15-20 minutes)
- Improving:
- Based on student test results, have each group identify things they might need to improve on.
- Give students time to modify their prototypes and test again if time allows.
- (optional) Let students do this as many times as time permits, or until they have it how they want it.
Day 3
Presentation and Reflection (20-30 minutes)
- Presentations: Have each group present their problem, solution, and the process they followed to the class.
- Reflection: Conduct a class discussion on what they learned about communication, the role of the brain, and the engineering design process.
- What was the biggest challenge you faced during the project, and how did you overcome it?
- How did working with your group members help you in completing the project?
- Describe a new idea or insight you gained about communication and its importance through this activity.
- How did using the micro:bit enhance your design and communication tool?
- If you had more time or resources, what additional features or changes would you make to your prototype?
Vocabulary/Definitions
communicate: To send or receive a message.
computer programming: The process of giving a computer instructions in a language it can understand; also called coding.
design: A sketch, model, or plan for something.
engineer: Someone who designs, builds, and tests things to solve problems.
engineering: Using science and math to creatively solve problems.
improve: To make something better.
light: Allows us to see objects in the dark.
message: Information that is sent or given to someone.
microchip: The brains of electronic devices; they send and receive patterns that help our electronics work.
problem: A challenge that needs a solution.
solve: To find a solution to a challenge or problem.
sound: Noise caused by an object vibrating.
test: To check to see if something is working.
transmit: To send from one place to another.
Assessment
Pre-Activity Assessment
Discussion Questions:
- What happens in our brain when we talk or write? (Answer: Our brain signals to our mouth to form words and processes sounds to understand language.)
- Why is communication important for solving problems? (Answer: It allows us to share information and work together to find solutions.)
- Name a tool that helps people with hearing loss communicate. (Answer: Hearing aid or sign language.)
Activity Embedded (Formative) Assessment
Walk around the classroom and observe group discussions and activities. Ask probing questions to assess understanding:
- What communication problem is your group focusing on, and why?
- How does your group’s prototype address this problem?
Assess the progress of their prototypes.
Post-Activity (Summative) Assessment
Post-Quiz: Have students complete the Mindful Messages Post-Quiz.
Troubleshooting Tips
Common snags that you might encounter while conducting the activity would be connecting and coding the micro:bit. The micro:bit was designed for students to use, so it is durable, but they still need to be careful when plugging it in to download the code to it.
Activity Extensions
Research Project: Students could research historical communication tools and compare them to modern technology.
Guest Speaker: You could invite a neuroscientist or engineer to talk about real-world applications of communication technology.
Language Diversity: Explore different languages and how the brain processes them, discussing multilingual communication tools.
Activity Scaling
- For lower grades, you can increase the amount of time given for completing the prototypes. Instead of letting students figure out the code, you can give them some hints and help them code.
- For older grades or advanced students, you can give them less time for the prototype and more constraints.
Subscribe
Get the inside scoop on all things TeachEngineering such as new site features, curriculum updates, video releases, and more by signing up for our newsletter!More Curriculum Like This

Students are introduced to various types of hearing impairments and the types of biomedical devices that engineers have designed to aid people with this physical disability. Students learn about the hearing process and ways in which hearing can be lost.
Copyright
© 2024 by Regents of the University of Colorado; original © 2024 University of MissouriContributors
Jessica White, Dr. Satish NairSupporting Program
Research Experience for Teachers (RET), University of Missouri ColumbiaAcknowledgements
The curriculum was developed under National Science Foundation RET Satellite program option. Any opinions, findings, and conclusions or recommendations expressed in this material are those of the authors and do not necessarily reflect the view of the National Science Foundation.
Last modified: November 6, 2024


User Comments & Tips