
Quick Look
Grade Level: 4 (3-5)
Time Required: 3 hours
(four 45-minute sessions, or three 60-minute sessions)
Expendable Cost/Group: US $0.00
Group Size: 3
Activity Dependency: None
Subject Areas: Physical Science, Science and Technology
NGSS Performance Expectations:

| 3-5-ETS1-1 |
| 4-PS3-2 |
| 4-PS3-4 |
Quick Look

- Grade Level:
- 4 (3 – 5)
- Time Required:
- 3 hours
(four 45-minute sessions, or three 60-minute sessions)
- Group Size:
- 3
- Subject Areas:
-
Physical Science Science and Technology -
NGSS Performance Expectations:
3-5-ETS1-1 4-PS3-2 4-PS3-4

Summary
Students create solar cells using dyes extracted from fruits and vegetables to test how color affects the conversion of solar energy to electrical energy. They apply the engineering design process by asking questions and hypothesizing which fruit or vegetable will produce the most energy. After assembling their solar cells, students test the output using a multimeter to measure voltage. They then analyze their results and have the opportunity to redesign, rebuild, and retest their solar cells for improved performance.Engineering Connection
A chemical engineer applies principles of chemistry, physics, biology, and mathematics to solve problems related to the production and use of chemicals and materials. They conduct research and development to create new materials and processes, as well as improve existing ones. Chemical engineers design manufacturing processes for large-scale production of items such as plastics, pharmaceuticals, and fuels, ensuring that these processes are safe and meet environmental regulations. Chemical engineers play a vital role in creating products that enhance our everyday lives while prioritizing safety and environmental sustainability.
Learning Objectives
After this activity, students should be able to:
- Describe how energy is converted and transferred.
- Apply scientific ideas and the engineering design process to design, test, and refine a solar cell.
- Understand that the earth’s renewable resources can be used in different ways.
Educational Standards
Each Teach Engineering lesson or activity is correlated to one or more K-12 science,
technology, engineering or math (STEM) educational standards.
All 100,000+ K-12 STEM standards covered in Teach Engineering are collected, maintained and packaged by the Achievement Standards Network (ASN),
a project of D2L (www.achievementstandards.org).
In the ASN, standards are hierarchically structured: first by source; e.g., by state; within source by type; e.g., science or mathematics;
within type by subtype, then by grade, etc.
Each Teach Engineering lesson or activity is correlated to one or more K-12 science, technology, engineering or math (STEM) educational standards.
All 100,000+ K-12 STEM standards covered in Teach Engineering are collected, maintained and packaged by the Achievement Standards Network (ASN), a project of D2L (www.achievementstandards.org).
In the ASN, standards are hierarchically structured: first by source; e.g., by state; within source by type; e.g., science or mathematics; within type by subtype, then by grade, etc.
NGSS: Next Generation Science Standards - Science
| NGSS Performance Expectation | ||
|---|---|---|
|
3-5-ETS1-1. Define a simple design problem reflecting a need or a want that includes specified criteria for success and constraints on materials, time, or cost. (Grades 3 - 5) Do you agree with this alignment? |
||
| Click to view other curriculum aligned to this Performance Expectation | ||
| This activity focuses on the following Three Dimensional Learning aspects of NGSS: | ||
| Science & Engineering Practices | Disciplinary Core Ideas | Crosscutting Concepts |
| Define a simple design problem that can be solved through the development of an object, tool, process, or system and includes several criteria for success and constraints on materials, time, or cost. Alignment agreement: | Possible solutions to a problem are limited by available materials and resources (constraints). The success of a designed solution is determined by considering the desired features of a solution (criteria). Different proposals for solutions can be compared on the basis of how well each one meets the specified criteria for success or how well each takes the constraints into account. Alignment agreement: | People's needs and wants change over time, as do their demands for new and improved technologies. Alignment agreement: |
| NGSS Performance Expectation | ||
|---|---|---|
|
4-PS3-2. Make observations to provide evidence that energy can be transferred from place to place by sound, light, heat, and electric currents. (Grade 4) Do you agree with this alignment? |
||
| Click to view other curriculum aligned to this Performance Expectation | ||
| This activity focuses on the following Three Dimensional Learning aspects of NGSS: | ||
| Science & Engineering Practices | Disciplinary Core Ideas | Crosscutting Concepts |
| Make observations to produce data to serve as the basis for evidence for an explanation of a phenomenon or test a design solution. Alignment agreement: | Energy can be moved from place to place by moving objects or through sound, light, or electric currents. Alignment agreement: Energy is present whenever there are moving objects, sound, light, or heat. When objects collide, energy can be transferred from one object to another, thereby changing their motion. In such collisions, some energy is typically also transferred to the surrounding air; as a result, the air gets heated and sound is produced.Alignment agreement: Light also transfers energy from place to place.Alignment agreement: Energy can also be transferred from place to place by electric currents, which can then be used locally to produce motion, sound, heat, or light. The currents may have been produced to begin with by transforming the energy of motion into electrical energy.Alignment agreement: | Energy can be transferred in various ways and between objects. Alignment agreement: |
| NGSS Performance Expectation | ||
|---|---|---|
|
4-PS3-4. Apply scientific ideas to design, test, and refine a device that converts energy from one form to another. (Grade 4) Do you agree with this alignment? |
||
| Click to view other curriculum aligned to this Performance Expectation | ||
| This activity focuses on the following Three Dimensional Learning aspects of NGSS: | ||
| Science & Engineering Practices | Disciplinary Core Ideas | Crosscutting Concepts |
| Apply scientific ideas to solve design problems. Alignment agreement: | Energy can also be transferred from place to place by electric currents, which can then be used locally to produce motion, sound, heat, or light. The currents may have been produced to begin with by transforming the energy of motion into electrical energy. Alignment agreement: The expression "produce energy" typically refers to the conversion of stored energy into a desired form for practical use.Alignment agreement: Possible solutions to a problem are limited by available materials and resources (constraints). The success of a designed solution is determined by considering the desired features of a solution (criteria). Different proposals for solutions can be compared on the basis of how well each one meets the specified criteria for success or how well each takes the constraints into account.Alignment agreement: | Energy can be transferred in various ways and between objects. Alignment agreement: Engineers improve existing technologies or develop new ones.Alignment agreement: Most scientists and engineers work in teams.Alignment agreement: Science affects everyday life.Alignment agreement: |
State Standards
Texas - Science
-
identify and classify Earth's renewable resources, including air, plants, water, and animals; and nonrenewable resources, including coal, oil, and natural gas; and the importance of conservation.
(Grade
4)
More Details
Do you agree with this alignment?
-
plan and implement descriptive investigations, including asking well-defined questions, making inferences, and selecting and using appropriate equipment or technology to answer his/her questions;
(Grade
4)
More Details
Do you agree with this alignment?
Materials List
Multimedia resources:
- “The Couch Potato” by Jory John and Pete Oswald (6:13 minutes)
- How do solar panels work? - Richard Komp (4:59 minutes)
- Can 100% renewable energy power the world? - Federico Rosei and Renzo Rosei (5:54 minutes)
For the teacher before the activity:
- tape
- 4 oz. TiO2 (titanium dioxide)
- 1 oz. white vinegar
- 1 stirring rod
- 1 small beaker
- 1 hot plate
- (optional) cotton swabs
Each student needs:
- 1 Engineering Notebook
- 1 writing utensil
- 1 lab coat, apron, or piece of old clothing
- 1 pair of protective glasses or goggles
- 1 pair of gloves
Each group needs:
- 2 pieces of conductive glass with pre-deposited titanium dioxide (TiO2) (See instructions in the Before the Activity section for how to make and apply the TiCO2 paste.)
- 2 #2 pencils
- 1 zip lock sandwich bag
- 1 mortar and pestle (for spinach)
- 1 fruit or vegetable
- 1 spoon
- 1 pipette
- 1 tweezer
- 1 multimeter
- 1 wash/squirt bottle
- 2 binder clips
- paper towels
For the entire class to share:
- 1 laptop or table (to show videos)
- 1 projector (to show videos)
- 1 bottle of iodide electrolyte (teacher will put on cells)
- 1 digital scale
- raspberries
- spinach
- blueberries
- cherries
- blackberries
Worksheets and Attachments
Visit [www.teachengineering.org/activities/view/uot-2885-power-produce-fruits-veggies-solar-cells-activity] to print or download.Pre-Req Knowledge
Students should have:
- A basic understanding of natural resources.
- The ability to identify renewable resources vs. nonrenewable resources.
- A basic understanding of the engineering design process.
Introduction/Motivation
Today, we are going to learn about energy! Before we begin, I want us to think about the interactions between color and energy. What do you know about how materials of different colors interact with light energy? (Students will turn and talk.)
(Have students watch the 6:13 minutes video of “The Couch Potato” by Jory John and Pete Oswald on YouTube.)
Why is learning about energy important? (Let students offer answers.) We often hear reports about power outages. What are some ways that you might be able to get power in the event of an outage? (Let students brainstorm ways on how to get even a few minutes of power to locate the needed flashlights and/or candles.) It makes me wonder: Are there any way fruits or vegetables can assist with providing energy?
(optional) What do we already know about color and its interaction with energy? (Review what students already know about color and energy.)
Today you are going to put on your engineering hats to determine which fruits and vegetables will produce the most energy for a solar cell. You are going to work in small groups to create a solar cell using dye(s) extracted from fruits and vegetables to test which color fruit/vegetable converts the most solar energy to electrical energy. The solar cells will be put to the test with the help of a multimeter to determine which fruit and/or vegetable produced the highest voltage. Does your fruit or vegetable have what it takes to produce the highest amount of energy?
Procedure
Background
How does a dye-sensitized solar cell work? The dye on the solar cell functions as photoactive material. When light meets the dye, the dye captures protons of incoming light and uses energy from these protons to excite the electrons in the cell. The dye then injects the excited electron into the titanium dioxide. The electron is conducted away by nanocrystalline titanium dioxide. A chemical electrolyte in the cell then closes the circuit so that the electrons are returned to the dye. It is the movement of these electrons that creates energy that is used in a rechargeable battery.
Light is the type of energy that allows us to see the world around us. It travels in waves, like the waves in the ocean. The light we can see with our eyes is called visible light. Visible light is made up of many colors, like a rainbow! Light waves come in different lengths; some waves are short, and some are long. We call the length of these waves “wavelengths.” Each color of light has a different wavelength. For example, red has long wavelengths, while blue has short wavelengths. When you see a rainbow, you see all the colors of visible light. The colors in a rainbow (from longest wavelength to shortest) are known by the acronym ROY G BIV:
★ Red
★ Orange
★ Yellow
★ Green
★ Blue
★ Indigo
★ Violet
The energy of light is related to its wavelength. Light with long wavelengths (like red) has less energy. Light with shorter wavelengths (like blue and violet) has more energy.

- Voltage: Voltage is like the “push” that makes electric charges move in a circuit. It is measured in volts.
- Current: Current is the flow of electric charges through a circuit. It is measured in amperes (A), often called “amps.”
- Power: Power is the rate at which electrical energy is used or produced. It is measured in watts (W).
- Energy: Energy is the total amount of work done, or heat produced, by electrical power over time.
Before the Activity: Day 1
- Gather various produce such as raspberries, spinach, blueberries, cherries, and blackberries.
- Make copies of the Engineering Notebook (1 per student).
- Follow these steps to prepare the conductive glass with TiO2 paste:
- Use a multimeter to determine which side of the glass is conductive.
- Tape down approximately ⅛ of the conductive glass to the table, leaving a border around the edges.
- Create the TiO2 paste by mixing ½ tsp. of titanium dioxide powder with 3 drops of white vinegar in a small beaker, stirring well with a stirring rod.
- Add 3 drops of the TiO₂ paste to the conductive glass and spread it evenly across the untaped section using the side of a stirring rod until the entire area is covered.
- Once the paste is dry (approximately 10 minutes), remove the tape.
- Once dry, place the conductive glass on the hotplate with the paste side up.
- Heat the glass until the paste turns brown and then returns to white, indicating it is done.
- Allow the hot plate to cool gradually to avoid cracks in the glass substrate.

Alternatively, follow these instructions from Science Buddies: https://www.sciencebuddies.org/teacher-resources/lesson-plans/dye-sensitized-solar-cell.
During the Activity
Day 1: (45 min)
Ask (20 min)
- Present the Introduction/Motivation section.
- Give each student an Engineering Notebook.
- Ask students to answer the Pre-Assessment question in their Engineering Notebook.
- Chart the students’ predictions on the board.
- Go over the steps of the engineering design process (diagram in their Engineering Notebook.)
- Have students write down the problem they are trying to solve in the “Ask” section of their Engineering Notebook. (Answer: Which color fruit/vegetable converts the most solar energy to electrical energy?)
Research (20 min)
- Show students the video How do solar panels work? - Richard Komp (4:59)
- Have students write down what they learned and what they wonder from the video in the “Research” section of their Engineering Notebook.
- Show students the video Can 100% renewable energy power the world? - Federico Rosei and Renzo Rosei (5:54)
- Have students write down what they learned and what they wonder from the video in the “Research” section of their Engineering Notebook.
Imagine (5 min)
- Have students write down what types of dyes they imagine would have the highest voltage in the “Imagine” section of their Engineering Notebook.
- (if time) Discuss what they learned and what they wondered as a class.
- (optional) For homework, ask students to research the answers to what they wondered from the videos.
Day 2: (45 min)
Create (45 min)
- Divide the class into small groups.
- Assign or have each group choose one fruit or vegetable to be tested.
- Have students note their chosen fruit or vegetable in their Engineering Notebook and write down what they think their dye will do.
- Have students put on their personal protective equipment (PPE).
- Walk through the following steps with the students:
- With their chosen fruit or vegetable, have each group prepare the juice by mashing their fruit/vegetable in a zip lock sandwich bag or by first using a mortar and pestle and then transferring the liquid to a zip lock bag. Note: Students should not add additional water to the juices.

A student displays her group’s dyed conductive glass. - Instruct the students to place the conductive glass with the TiO2 coating into the bag with the crushed fruit or vegetable juice. Allow the glass to sit in the bag for 3-5 minutes.

A student prepares the counter electrode. - Have students take the second piece of conductive glass and determine which side is conductive. Students should use the multimeter with its setting placed on resistance (Ω) to figure out which side is conductive. (The conductive side of the slide gives a non-zero reading on the multimeter.)

Students take the second piece of conductive glass and test which side is the conductive side using a multimeter. - Have students color the conductive side of the glass using a #2 pencil. Remind students that graphite is a good conductor of electricity. It allows electrons to move freely, making it useful for conductivity tests.

The conductive side is colored using a #2 pencil. - Take out the conductive glass that was dyed using tweezers. Make sure to only touch the edges!
- Use a squirt bottle of water to rinse the excess fruit residue off the glass.

Students remove the conductive glass that was dyed using tweezers and use a pipette to rinse off excess fruit residue. - Place the glass on a paper towel and gently dab to dry.
- Have students assemble the solar cell by sandwiching the graphite side of the conductive glass with the dyed side, making sure that the two pieces are offset/staggered with the edge of the paste to expose as much glass slide as possible and to cover the entire TiO2 surface.
- Place a binder clip with the two edges that are flush (e.g., where the two slides meet up on the long side.)

An example of a solar cell with alligator clips with offset edges. - Have students sketch what their cell looks like once assembled in their Engineering Notebook.
Day 3: (45 min)
Test (20 min)
- Use a pipette to add a small amount of electrolytes to the offset edges of each group’s cells, making sure the electrolyte soaks through the entire cell.
- The cell is now complete!
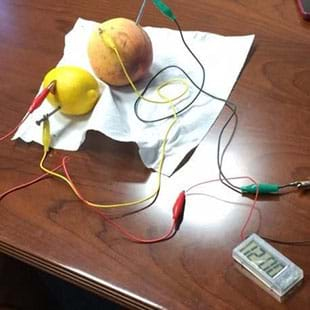
An example of a completed solar cell. - Have students test their solar cells using the multimeter.
- Have students place the multimeter probes on opposite ends of the solar cell’s conductive glass slides.
- Have students place their solar cell under either sunlight or a flashlight.
- Have students use the multimeter set to measure electric potential to measure the voltage of the solar cell.
- Have students record their measured voltage in mV in their Engineering Notebook.
- Have students repeat and record their measurements two more times.

Students measure the voltage of their solar cells.
- Have each group average the voltages of their three measurements and record the value in their Engineering Notebook.
- Have each group add their information to the Class Results Table on the board.
- Have each student copy down the Class Results table into their Engineering Notebook.
Evaluate (25 min)
- Have students evaluate their design relative to their classmates’ results.
- Have students answer the questions in the “Evaluate” section of their Engineering Notebook.
- Students should think about: What changes could be made to their solar cell to improve the voltage produced? Would a different dye color work better? Do they want a darker dye? Should they consider combining two different colors of dye?
- Guide students to fill out the “Improve” table in their Engineering Notebook.
- Give students time to research how colors interact with light energy and record their findings in their Engineering Notebook.
- (optional) As homework, assign students to research how colors interact with light energy and record their findings in their Engineering Notebook.
Day 4: (45 min)
Improve (45 min)
- Give students time to redesign and retest their solar cell, noting which variable was changed.
- Have students complete the improvement chart in their Engineering Notebook.
- Have students complete the “Exit Ticket” section in their Engineering Notebook.
Vocabulary/Definitions
atoms: A particle that consists of a nucleus of protons and neutrons surrounded by a cloud of electrons.
conservation: The preservation or efficient use of resources, or the conservation of various quantities under physical laws.
current: The flow of electric charges through a circuit. It is measured in amperes (A), often called “amps.”
dye-sensitized solar cell (DSSC): Use of an organic dye to absorb incoming sunlight to produce excited electrons and create energy.
energy: The total amount of work done, or heat produced, by electrical power over time.
nonrenewable resource: A natural resource that cannot be readily replaced by natural means at a pace quick enough to keep up with consumption.
power: The rate at which electrical energy is used or produced. It is measured in watts (W).
renewable resource: A natural resource that will replenish to replace the portion depleted by usage and consumption, either through natural reproduction or other recurring processes in a finite amount of time in a human time scale.
silicon: A natural element that functions as a semiconductor.
voltage : The “push” that makes electric charges move in a circuit. It is measured in volts.
Assessment
Pre-Activity Assessment: Day 1
Classroom discussion: Ask students: What do you know about how materials of different colors interact with light energy? (Let students turn and talk).
Brainstorm: What do we need energy for? What are some things you do every day that require the use of energy? What happens if we run out of energy? What would we do? Have you ever lost power? What did you and your family do? How long were you without power? Minutes? Hours? Days? As a class, record answers on the board.
Activity Embedded (Formative) Assessment
Engineering Notebook: Which fruit and/or vegetable do you think will produce the most voltage?
Post-Activity (Summative) Assessment: Day 3
Exit Ticket: Students answer the “Exit Ticket” section in the Engineering Notebook.
Troubleshooting Tips
- Prepare the TiO2 paste to use with the conductive glass before the activity.
- Use gloves when handling the prepared conductive glass.
- Be prepared for cells to produce various amounts of voltage.
- Be prepared for the possibility that some student groups may take a competitive approach to the activity. Remind students that we are all here to learn.
Activity Scaling
- Lower Grades: Have students collect milk cartons. They will use recycled milk cartons to create a neighborhood using these recycled materials. They will use the dye extracted from the fruit to paint their houses. The teacher will create solar cells to add to the homes.
- Upper Grades: Have students utilize their knowledge to design model homes using recycled materials to construct their models. These model homes will include the solar cells they created to light up their homes! Students will make connections to the process of commercial/large-scale solar technologies used in everyday life, as they mimic conversion of sunlight to electrical energy either through photovoltaic (PV) panels or through mirrors that concentrate solar radiation.
Subscribe
Get the inside scoop on all things Teach Engineering such as new site features, curriculum updates, video releases, and more by signing up for our newsletter!More Curriculum Like This

While many students understand that fruits and vegetables can give our bodies energy, they may not know that these same fruits and vegetables can power small electrical devices! In this activity, students experiment with various fruits and vegetables to determine the amount of electrical energy eac...
Students learn and discuss the advantages and disadvantages of renewable and non-renewable energy sources. They also learn about our nation's electric power grid and what it means for a residential home to be "off the grid."

Other Related Information
Encyclopedia:
- Wikipedia: Dye-Sensitized Solar Cell
Gartner Glossary
- Dye-Sensitized Solar Cells
YouTube:
- Federico Rosei and Renzo Rosei: Can 100% renewable energy power the world?https://youtu.be/RnvCbquYeIM
- Richard Komp: How do solar panels work?
Reading Connection:
- Jory John and Pete Oswald, “The Couch Potato” 2020.
Copyright
© 2024 by Regents of the University of Colorado; original © 2023 University of Texas at AustinContributors
Yvonne Rodriguez, Ruben Ramirez, Sean Roberts, Cam Li, Zachary Wilborn and Risa HartmanSupporting Program
Research Experience for Teachers (RET), Cockrell School of Engineering, University of Texas at AustinAcknowledgements
This curriculum was developed under National Science Foundation RET grant no. DMR-1720595— Center for Dynamics and Control of Materials at the University of Texas at Austin. Any opinions, findings, and conclusions or recommendations expressed in this material are those of the authors and do not necessarily reflect the views of the National Science Foundation.
Last modified: November 5, 2024
User Comments & Tips