Quick Look
Grade Level: High school
Time Required: 1 hours 30 minutes (wild guess!)
Subject Areas: Biology, Life Science, Science and Technology

Maker Challenge Recap
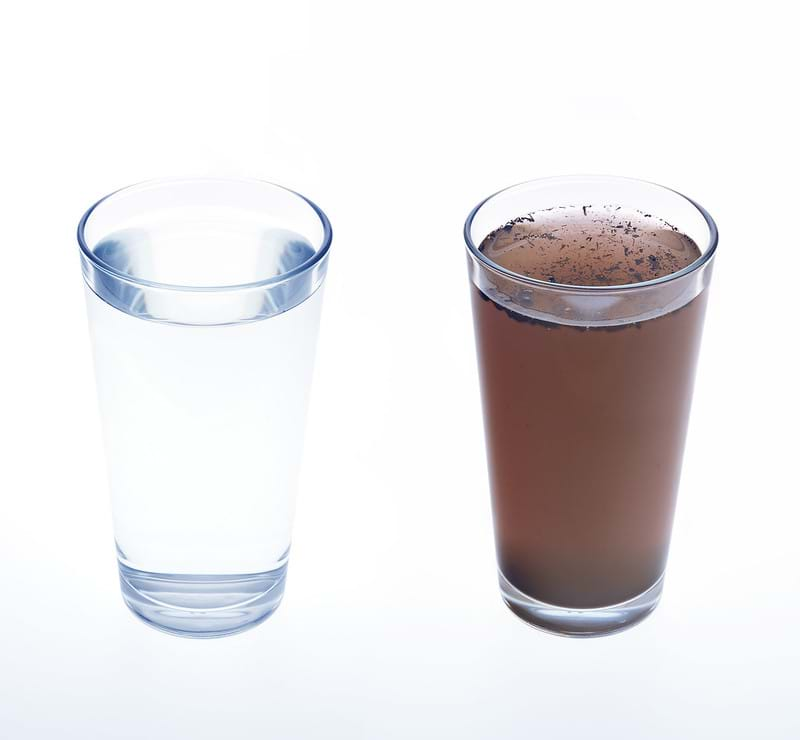
Access to clean water is a major problem we face in the world today, especially in developing countries and during, and in the aftermath of, natural disasters. Currently, there is a portable water purification device called the LifeSaver bottle that can bring clean water to people; however, it is too expensive for most individuals. In this maker challenge, students work through the engineering design process. They create a water bottle from commonly available materials used in purification tools, that can assist in cleaning dirty water as an inexpensive alternative to the LifeSaver Bottle.
Maker Materials & Supplies
Note: Most supplies are available online or in a local hardware store.
- Materials to build the water bottle:
- different types of plastic water bottles (these can be recycled items brought in from home)
- coffee filter paper
- Whatman filter paper, available online
- mesh (several different varieties; thin and heavy duty)
- hot glue guns and glue sticks
- scissors
- rubber bands
- air conditioning filter paper
- Types of water cleaning media:
- granular activated carbon, available online
- Zeolite, available online
- Equipment for water quality test:
- pH meter or pH strips, available online
- beaker
- water quality test strips
- dirty water (either from a local water source or handmade)
- distilled water
Worksheets and Attachments
Visit [www.teachengineering.org/makerchallenges/view/rice2-2408-drinking-water-drinkable-design-challenge] to print or download.Subscribe
Get the inside scoop on all things TeachEngineering such as new site features, curriculum updates, video releases, and more by signing up for our newsletter!More Curriculum Like This

Filtering is the process of removing or separating the unwanted part of a mixture. In signal processing, filtering is specifically used to remove or extract part of a signal, and this can be accomplished using an analog circuit or a digital device (such as a computer). In this lesson, students learn...
Kickoff
[Begin the maker challenge by showing students the TED video “Michael Pritchard: How to make dirty water drinkable”. Pause the video at 1:10 before the introduction to the LifeSaver water bottle to discuss possible water contaminants and their sources.]
What are some possible water contaminants and their sources? [Write down student responses on the board as the students share their thoughts. Resume the video to show them a solution that can bring clean water to people in need.]
How does the LifeSaver water bottle work? The LifeSaver bottle is a portable water purification device that filters out particles and objects bigger than 15 nm—including viruses, bacteria, cysts, fungi, parasites and other microbiological pathogens in water. To filter the water, contaminated water is poured into the water bottle and the user manually pumps up the bottle. This pumping creates pressure that pushes the water through a nanofilter. The clean water collects in a separate chamber of the bottle and an individual can then drink the safe drinking water out of the top. The whole filtering process takes about 20 seconds, and the bottle has an interchangeable filter that filters 0.71 L (1.5 pints) of water at a time, purifying up to 6,000 L over the course of its lifetime.
There is a larger version of the LifeSaver bottle, called the LifeSaver Jerrycan. It uses the same filtering technology but it can filter 10,000 to 20,000 L over the course of its lifetime. One LifeSaver Jerrycan filter can provide water for four people for three years!
Now, how much do you think that water bottle costs? [After a couple of guesses, tell the students that it costs $150!] What do you think about that? Do you think that is an affordable piece of technology?
Today you are going to play the role of engineers and create a water bottle similar to the LifeSaver that can clean dirty water with common items used in purification. You will be tasked with developing a prototype and then iterating to improve upon it.
Resources
- Refer to the Engineering Design Process hub on TeachEngineering to guide your students through the challenge.
- TED Talk: “Michael Pritchard: How to make dirty water drinkable”: https://www.youtube.com/watch?v=rXepkIWPhFQ&feature=youtu.be
- An explanation of how spectrophotometers analyze samples: “The Spectrophotometer: A demo and practice experiment": https://www.youtube.com/watch?v=xHQM4BbR040
- Student Worksheet
- Making Dirty Water Drinkable PowerPoint Presentation
Maker Time
- Students will work in teams of four to develop their own prototype of a water bottle that cleans dirty water. They may run tests on any of the materials before building to become familiar with them in order to decide if they are going to use them in their design.
- Students may do initial sketches of their design and draw their final design on the Student Worksheet. The teacher should check the design and offer suggestions, if necessary.
- Students build their water bottle and run some water quality tests to see how well it worked.
- The students record the general characteristics of the water (transparency, color), pH (should be close to seven for clean water). Students may also use a water quality test strip to test for bacteria and other pollutants that are invisible to the naked eye. (See “Tips” below for incorporating a spectrophotometer into the activity, if one is available for use.)
- Students will also test the dirty water to be able to compare and make a judgment about the efficiency of their water bottle.
Wrap Up
- A student representative from each group will display their water bottle and summarize the results of their test.
- Once each group has presented, students may alter their designs based off their experiments and the designs of their classmates. The may retest to see if their new design improved the ability to clean the dirty water. If there is limited time, you may ask students to collaborate and design a water bottle as a class.
- The students discuss the parts of the water bottle that they liked from each group and a class design. Students reflect on their learning by writing a summary of what they have learned about water pollution, the effects of dirty water on human health, and their engineering design process.
Tips
If you are in a laboratory that has access to a spectrophotometer, view the video, “The Spectrophotometer: A demo and practice experiment” from YouTube to help you.
- Turn on the spectrophotometer and click on the wavelength button (ƛ). Select 1 wavelength and enter in 600 for the nm length. Press ENTER. Select “NO” for background reading. Fill a blank cuvette with distilled water. Clean off the sides and put the cuvette in the spectrophotometer with the smooth side facing the arrow. Press “READ BLANK” and the value should come back as 0.0 AU. Your spectrophotometer is now ready for student samples. Have students record their reading when it appears.
Copyright
© 2019 by Regents of the University of Colorado; original © 2019 Rice UniversityContributors
Taylor MillerSupporting Program
Engineering Research Center for Nanotechnology Enabled Water Treatment Systems (NEWT) RET, Rice UniversityAcknowledgements
This curriculum was based upon work supported by the National Science Foundation under Rice University Engineering Research Center for Nanotechnology Enabled Water Treatment Systems (NEWT) RET grant no.1449500. Any opinions, findings, and conclusions or recommendations expressed in this material are those of the authors and do not necessarily reflect the views of the National Science Foundation.
Special thanks to Christina Crawford and Kate Roman.
Last modified: July 31, 2020


User Comments & Tips