Quick Look
Grade Level: 11 (10-12)
Time Required: 4 hours
(three 80-minute class periods)
Expendable Cost/Group: US $0.00
Group Size: 3
Activity Dependency: None
Subject Areas: Measurement, Physical Science, Physics, Problem Solving, Science and Technology
NGSS Performance Expectations:

| HS-ETS1-2 |
Quick Look 

- Grade Level:
- 11 (10 – 12)
- Time Required:
- 4 hours
(three 80-minute class periods)
- Group Size:
- 3
- Subject Areas:
-
Measurement Physical Science Physics Problem Solving Science and Technology -
NGSS Performance Expectations:
HS-ETS1-2


Summary
Through this approximately three-day activity, students learn about the different types of 3D printers. They focus on Fused Deposition Modeling (FDM) printing, the parts of 3D printers, how to use CAD software (in particular, OnShape), and complete an engineering challenge (a hook to hold a mass) using 3D printing. There is some room for discussion and reflection on 3D printing at the end of the lesson. Teachers should have prerequisite knowledge of 3D printing and using CAD software (OnShape is used here). If they do not have this prerequisite knowledge, checking out some YouTube videos may be helpful.Engineering Connection
3D printing is a way to solve complex problems and has been used in a variety of situations; for example, 3D printing is currently used in many research settings to solve everyday problems that engineers face. 3D printing is also being used off-world on the International Space Station to 3D print tools that would have otherwise taken time and money to bring them into space. Over the last few years, 3D printing has also come to be seen as a way of engineering structures on other planets, namely Mars, as we expand our reach beyond our own planet. It is critical for students to not only have a knowledge of 3D printing for its innate utility, but also for how impactful it will be in their futures.
Learning Objectives
After this activity, students should be able to:
- Create a CAD model.
- Create a 3D print using a 3D printer.
Educational Standards
Each TeachEngineering lesson or activity is correlated to one or more K-12 science,
technology, engineering or math (STEM) educational standards.
All 100,000+ K-12 STEM standards covered in TeachEngineering are collected, maintained and packaged by the Achievement Standards Network (ASN),
a project of D2L (www.achievementstandards.org).
In the ASN, standards are hierarchically structured: first by source; e.g., by state; within source by type; e.g., science or mathematics;
within type by subtype, then by grade, etc.
Each TeachEngineering lesson or activity is correlated to one or more K-12 science, technology, engineering or math (STEM) educational standards.
All 100,000+ K-12 STEM standards covered in TeachEngineering are collected, maintained and packaged by the Achievement Standards Network (ASN), a project of D2L (www.achievementstandards.org).
In the ASN, standards are hierarchically structured: first by source; e.g., by state; within source by type; e.g., science or mathematics; within type by subtype, then by grade, etc.
NGSS: Next Generation Science Standards - Science
| NGSS Performance Expectation | ||
|---|---|---|
|
HS-ETS1-2. Design a solution to a complex real-world problem by breaking it down into smaller, more manageable problems that can be solved through engineering. (Grades 9 - 12) Do you agree with this alignment? |
||
| Click to view other curriculum aligned to this Performance Expectation | ||
| This activity focuses on the following Three Dimensional Learning aspects of NGSS: | ||
| Science & Engineering Practices | Disciplinary Core Ideas | Crosscutting Concepts |
| Design a solution to a complex real-world problem, based on scientific knowledge, student-generated sources of evidence, prioritized criteria, and tradeoff considerations. Alignment agreement: | Criteria may need to be broken down into simpler ones that can be approached systematically, and decisions about the priority of certain criteria over others (trade-offs) may be needed. Alignment agreement: | Models (e.g., physical, mathematical, computer models) can be used to simulate systems and interactions—including energy, matter, and information flows—within and between systems at different scales. Alignment agreement: |
Materials List
Make sure all materials and equipment are listed in the Procedure below.
Each group needs:
- digital caliper (available online)
- mass (for example, from a mass set (available online))
- 2 ft (~61 cm) of cotton twine
- 2 hooked stands (available online)
For the entire class to share:
- FDM 3D Printer (Prusa) or Monoprice (recommended)
- PLA filament spool (available online)
Worksheets and Attachments
Visit [www.teachengineering.org/activities/view/bos-2701-3d-printing-cad-software-activity] to print or download.Pre-Req Knowledge
It is assumed that students have no prerequisite knowledge regarding 3D printing.
Introduction/Motivation
What do you know about 3D printing? You’ve probably heard about it in the news, or someone might have told you about it. There was some news about the first 3D printed home recently, which is now on sale for purchase. There was also news about a competition NASA held for 3D-printing a Mars habitat using the types of material that are present on the Martian surface. Even the International Space Station, ISS, has its own 3D printer. Here on Earth, 3D printing is also being used in research labs all over the world, and there are even some cool applications known as 4D printing, which we won’t go into—but I would encourage you to look them up if you’re interested. In any case, the big question is: Why? Why is 3D printing such a big deal? And why is it important in engineering design?
Today, and over the next two days, we are going to dive deeper into 3D printing. We’re going to learn how 3D printing works, how to make stuff with a 3D printer, and then actually make it! My hope is that you will take 3D printing beyond our classroom. It’s important for us to learn about 3D printing because it’s becoming more accessible and it’s becoming an essential part of life—not just for engineers, but for hobbyists too. So, let’s get started!
Procedure
Background
This activity is broken up into three separate days, with some work between Days 2 and 3 required out of the classroom. Note the Before the Activity section for Day 3. Also note that the PowerPoint presentations include prompts for student discussions, build, and test parts of the activity.
This activity uses OnShape, a free browser-based CAD platform. If you are unfamiliar with OnShape, there is a learning center (https://learn.onshape.com) in which you can learn a variety of things and there are a variety of ways to learn - from video tutorials to self-paced guides. However this YouTube video playlist (https://www.youtube.com/watch?v=pMWnsHpDlQE – OnShape 3d CAD – Creating Objects and Sketches) may be helpful too.
Day 1:
Before the Activity
- Review the Day 1: 3D Printing Explained Presentation.
- If needed: Learn about 3D printing and CAD software. Review the PowerPoint presentations for an overview of 3D printing. See the Background section for additional resources.
- Create an OnShape account and familiarize yourself with OnShape
- Download a Slicer (such as Cura, available as a free download: https://ultimaker.com/software/ultimaker-cura/)
- Cut the cotton twine into 2 ft strips.
- To show students an example, tie a length of twine around the ends of two of the hooked stands.
With the Students
- Have students get into groups if they are not already in groups (ideally six groups per class).
- Go over the Day 1: 3D Printing Explained Presentation with students.
- Slide 2: Tell students, "Our main objective today is to learn how 3D printers work. You don't need to know everything about them or the exact mechanisms, but it is important because knowing how they work will help us figure out how to fix them when they break, which can happen a lot depending on the type of printer you use."
- Slide 5: As you are hearing from students, make sure to write down what they say; you can use this for reference when talking about the different parts.
- Slide 7: Tell students, "Depending on your specific need, you may use a different type of printer. SLA printers are really good for creating things like action figures or materials with varying properties, such as materials that are extremely strong."
- Slide 8: Tell students, "This is a typical FDM printer; FDM printers may look different depending on the manufacturer, but they all more or less work the same way. Some have an enclosure, others don't, etc."
- Slide 11: Tell students, “A lot of professional and hobbyists like to have a separate enclosure for their filament. This is because filament is sensitive to humidity and having an enclosure can help limit ambient humidity.”
- Slide 12: Tell students, "Sometimes things can go wrong with a printer's motion controls. If a belt gets loose, if a stepper motor isn't being supplied with enough voltage, or if an end stop breaks, you can get all sorts of problems."
- Slide 15: Tell students, “You may sometimes need to replace the nozzle or clean the nozzle. This may be the case if you get nozzle clog, where it seems like the printer isn’t extruding at all. There may also be temperature issues if your heater cartridge’s cable is broken or if your thermocouple isn’t picking up the right temperature. This may result in your printer smoking the print if the temperature is too high.”
- Slide 16: Tell students, "You may need to replace the gear that feeds the filament to the extruder head. You will know this if you are under extruding and it looks like the gear isn't pulling in enough filament. This rarely happens though."
- Slide 34: Make sure to look around the room. Many students will have difficulty making objects with dimensionalities. They may have a S line, but do not know that their hook needs to have a thickness in the x-y plane, so it has a thickness in the z plane.
- Encourage students to ask questions and discuss ideas with their groups during the marked slides in the presentation.
Day 2:
Before the Activity
- Review the Day 2: Creating a 3D Print Presentation.
- Update the file name example in Slide 17 (the file name is the first two letters of your first name + your last name)
- Practice an example to show students for Slide 12. I've created a circle to show them how to make a sketch and how to extrude it, then made a sketch on top of it and removed a part to make a hole.
- Optional: Contact students who have experience with OnShape/other CAD software and invite them to visit the class and provide support. For example, these students may be seniors in high school or local college students.
With the Students
- Go over the Day 2: Creating a 3D Print Presentation with the students:
- Slide 5: While probing for issues, it is important to recognize students can support each other. Is there another student who had a similar issue? Make sure to highlight them and leverage them for support. This is also a good time to acknowledge that this is hard to do, but it can be worthwhile and fun.
- Slide 8: Distribute masses and calipers to each group.
- Slide 12: I would recommend showing students how to do something very simple, such as creating a circle as described in the Day 2 Before the Activity section.
- Slide 14: As students work, see which students are done early or are doing a really good job. Have these students teach other students how to do things they are struggling with. This frees you up to observe the classroom as a whole and solidifies understanding of students who have just learned a new skill.
- Slide 18: As you check the STLs you receive from students, if you notice some STLs are extremely large or small from what is expected, ask students approximately how big they should be. They could have exporting issues if their documents units and exporting units were different from each other; they should both be in millimeters.
- Support students getting started with OnShape.
- Support students as they create their 3D prints.
- Optional: Have other students (e.g., high school seniors or even local college students) who have experience using OnShape and other CAD software visit the class and provide additional support.
- Make sure to receive STL models from each group of students.
Day 3:
Before the Activity
- Review the Day 3: Testing the 3D Print Presentation.
- Prepare and print STL models from each class. It is helpful to have multiple printers set up and slicing multiple STLs together. Print the STLs so that students can examine them. This should be done the day before since it might take time to print.

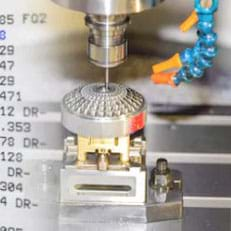
Four stickers that will eventually be used as a template to create a holder using 3D printing.
With the Students
- Distribute masses, strings, and hooked stands to each group.
- Go over the Day 3: Testing the 3D Print Presentation.

A sticker that will eventually be used as a template to create a holder using 3D printing.
- Slide 5: Distribute the 3D printed hooks to each group.
- Slide 7: As students talk about imperfections, this is a good time to note why these exist. For some prints, there can be curvature at the bottom - this indicates that there was uneven heating on the surface of the bed. For other prints, there might be some gaps, which could be caused from under extrusion or humidity. These lead to possible parts of the printer to check out.
- Slide 11: Make sure students securely tie the string to each hooked stand before testing their hooks. A lot of this day is based on reflection. If there is extra time, you can provide students with another 3D modeling challenge. A fun one is "Can you create a person on OnShape?" It gets them thinking about how to simplify complex shapes into simpler shapes for modeling.
- As students test their hook designs (presentation slide 11), walk around and ask them to explain their designs and if/how they would change the design during another iteration.


Vocabulary/Definitions
3D printer: A machine that creates an object, layer by layer, from a CAD model.
3D printing: The process and act of preparing a CAD model and printing it using a 3D printer.
CAD: CAD stands for Computer-Aided-Design; CAD software is used to create a model that is printable using a 3D printer.
caliper: A measurement device used to accurately measure the dimensions of an object.
filament: The material that is used to create a 3D print layer by layer. This material is most often a type of plastic (PLA) but can also have many different properties - such as ABS and TPE, and be composed of different materials like wood and carbon fiber.
Assessment
Pre-Activity Assessment
Discussion: This could be a discussion about any existing knowledge that students have about 3D printing.
e.g., What Do You Know?: Lead students through the Introductory Question, "What do you know about 3D printing?" on slide 5 of the Day 1 PowerPoint.
Activity Embedded (Formative) Assessment
Design and Build: As students create a model of a hook in CAD (Day 2), circulate around the room and check in with groups.
Post-Activity (Summative) Assessment
Test the Designs: As students test their hook designs (Day 3), check if their hook held the mass. Encourage students to discuss with their teams what worked, what didn’t work, and what they would change about their designs.
Investigating Questions
These are the introductory questions for each day:
- What do you know about 3D printing?
- You likely have started thinking about your 1st 3D print. What questions do you have before we start working on it together?
- What are the benefits of 3D printing? What else can it be used for? What problems can it solve? (Answers: 3D printing has many benefits; one of the best benefits is that you can create things tailored made for your needs. For example, you may need a wrench holder for the side of your desk and if it's the only tool you want to keep to the side because of frequency of use, you can easily print a holder for it while saving money on a more expensive, less customized and possibly bulky, holder. 3D printing can also be used to replace parts that are expensive, such as a $11,000 ventilator valve.)
On Day 3 after students have received their 3D prints, you might want to ask them:
- Does it look the way you imagined it?
- What improvements do you think you could make?
- Are there any imperfections or things you noticed that you want to ask about?
Safety Issues
There are no safety issues to be considered, as students will not be handling dangerous chemicals or anything of that sort. Students will not be using the 3D printers themselves.
Troubleshooting Tips
There are a variety of issues that can come up when examining a 3D print. Here are a few.
No filament on the bed. This might occur because the nozzle is too close to the bed and if using a 3D printer without auto leveling, it is recommended to manually level the printer and let it extrude clogged up filament before starting the print again.
Print continues without depositing filament. If this occurs, it might be for a number of reasons. First, check to make sure the filament hasn’t broken off; this can occur if it is tangled up. Second, the nozzle might have been clogged up; you can try to manually unclog it by using an acupuncture needle – just make sure the nozzle is heated up and then try to bring out the clogged filament.
Print doesn’t stick to bed. If you notice that the prints are moving around mid-print on the bed or depositing all over the bed, you likely have an adhesion problem. Depending on the printer, there are a few solutions. On the software side, you can add the “Adhesion” layer. If that doesn’t work, it might be that the nozzle is not close enough, so make sure that the nozzle is close enough to the bed. The last option would be to add adhesion from something like Elmer’s glue to the bed.
The prints are warped. If you notice that the prints have edges that are off the bed, this might happen for a couple of reasons. First, the bed might not be hot enough and the temperature difference causes the warm filament to curve up as it is cooling down; if this is the case, simply increase bed temperature. Second, it might be a regular adhesion problem so using adhesion – like Elmer’s glue or software-added would help.
Activity Extensions
This introduction to 3D printing activity can be helpful to prepare students for bigger projects that may require or be aided by 3D-printed objects.
A note on context: This lesson, while an introduction lesson, has a bigger purpose for this course. My students will be using their newfound 3D printing skills to create a lunar rover, which we will use to better understand the concepts of motion. If you would like more information on how my students will be applying their 3D printing skills, feel free to contact me. It is critical for students to apply these types of skills as much as they can so that they practice and hone their skills, and find personal purposes and uses for them.
Subscribe
Get the inside scoop on all things TeachEngineering such as new site features, curriculum updates, video releases, and more by signing up for our newsletter!More Curriculum Like This

Students learn about 3D printing and what considerations to make in the engineering design process to print an object with quality and to scale. Students learn the basic principles of computer-aided design (CAD) and how data points can be turned into a program that operates the 3D printer. Students ...
As if they are biomedical engineers, student teams investigate the bone structure of a real turkey femur and then create their own prototype implant versions. They measure, draw and then use modeling clay, plastic drinking straws and pipe cleaners to mimic the structure, mass and density of the real...

Copyright
© 2023 by Regents of the University of Colorado; original © 2021 Boston UniversityContributors
Christopher Alba, Revere High School, with support from Shereen Mejia MAT of East Boston High School, Boston, MA and Victoria Bartow MEd.Supporting Program
NSF Research Experience for Teachers (RET) in Integrated Nanomanufacturing at the Photonics Center, Boston UniversityAcknowledgements
This curriculum was based upon work supported by the National Science Foundation under RET grant no. EEC 1407165—at the Research Experience for Teachers in Integrated Nanomanufacturing at the Photonics Center at Boston University. Any opinions, findings, and conclusions or recommendations expressed in this material are those of the authors and do not necessarily reflect the views of the National Science Foundation.
Last modified: August 14, 2023
User Comments & Tips