Quick Look
Grade Level: 10 (9-12)
Time Required: 3 hours
(three 60-minute periods; 120 minutes to create the circuitry and app, 60 minutes to create the design and put it all together)
Expendable Cost/Group: US $21.00 This activity also uses many non-expendable (reusable) items; see the Materials List for details.
Group Size: 2
Activity Dependency: None
Subject Areas: Computer Science, Physics, Science and Technology
NGSS Performance Expectations:

| HS-ETS1-2 |
Quick Look 

- Grade Level:
- 10 (9 – 12)
- Time Required:
- 3 hours
(three 60-minute periods; 120 minutes to create the circuitry and app, 60 minutes to create the design and put it all together)
- Group Size:
- 2
- Subject Areas:
-
Computer Science Physics Science and Technology -
NGSS Performance Expectations:
HS-ETS1-2


Summary
Students apply sound-activated light-up EL wire to create personalized light-up clothing outfits. During the project, students become familiar with the components, code and logic to complete circuits and employ their imaginations to real-world applications of technology. Acting as if they are engineers, students are challenged to incorporate electroluminescent wire to regular clothing to make attention-getting safety clothing for joggers and cyclists. Luminescent EL wire stays cool, making it ideal to sew into wearable projects. They use the SparkFun sound detector and the EL sequencer circuit board to flash the EL wire to the rhythm of ambient sound, such as music, clapping, talking—or roadway traffic sounds! The combination of sensors, microcontrollers and EL wire enables a wide range of feedback and control options.Engineering Connection
Safety is often taken into consideration in the design and implementation of engineering projects. Engineers ensure their product, process and structure designs do not put people in harm’s way. Engineers also create new materials and design products such as bright reflective vests and signs as ways to proactively make workers more visible at roadway, construction and emergency sites. Wearable technology has extended to clothing, shoes and equipment for joggers and cyclists to make them more likely to be seen by vehicle drivers. How might reflective clothing be further improved? What if engineers added lights that react to sound? The lights would bring attention to the person wearing the vest and notify the wearer of moving vehicles nearby.
Learning Objectives
After this activity, students should be able to:
- Use technology components (microcontroller, sensor, wire, circuit, code) to make a functioning project, including soldering.
- Define what an electroluminescent (EL) wire is.
- Describe how sound can control a circuit.
- Explain what a circuit is.
- Explain how engineers are involved in human safety.
Educational Standards
Each TeachEngineering lesson or activity is correlated to one or more K-12 science,
technology, engineering or math (STEM) educational standards.
All 100,000+ K-12 STEM standards covered in TeachEngineering are collected, maintained and packaged by the Achievement Standards Network (ASN),
a project of D2L (www.achievementstandards.org).
In the ASN, standards are hierarchically structured: first by source; e.g., by state; within source by type; e.g., science or mathematics;
within type by subtype, then by grade, etc.
Each TeachEngineering lesson or activity is correlated to one or more K-12 science, technology, engineering or math (STEM) educational standards.
All 100,000+ K-12 STEM standards covered in TeachEngineering are collected, maintained and packaged by the Achievement Standards Network (ASN), a project of D2L (www.achievementstandards.org).
In the ASN, standards are hierarchically structured: first by source; e.g., by state; within source by type; e.g., science or mathematics; within type by subtype, then by grade, etc.
NGSS: Next Generation Science Standards - Science
| NGSS Performance Expectation | ||
|---|---|---|
|
HS-ETS1-2. Design a solution to a complex real-world problem by breaking it down into smaller, more manageable problems that can be solved through engineering. (Grades 9 - 12) Do you agree with this alignment? |
||
| Click to view other curriculum aligned to this Performance Expectation | ||
| This activity focuses on the following Three Dimensional Learning aspects of NGSS: | ||
| Science & Engineering Practices | Disciplinary Core Ideas | Crosscutting Concepts |
| Design a solution to a complex real-world problem, based on scientific knowledge, student-generated sources of evidence, prioritized criteria, and tradeoff considerations. Alignment agreement: | Criteria may need to be broken down into simpler ones that can be approached systematically, and decisions about the priority of certain criteria over others (trade-offs) may be needed. Alignment agreement: | |
International Technology and Engineering Educators Association - Technology
-
Students will develop an understanding of the role of troubleshooting, research and development, invention and innovation, and experimentation in problem solving.
(Grades
K -
12)
More Details
Do you agree with this alignment?
-
Illustrate principles, elements, and factors of design.
(Grades
9 -
12)
More Details
Do you agree with this alignment?
State Standards
Colorado - Science
-
There are different forms of energy, and those forms of energy can be changed from one form to another – but total energy is conserved
(Grade
8)
More Details
Do you agree with this alignment?
Materials List
Each group needs:
- 2 EL wire kits; such as the $10 kit from SparkFun, comes in a variety of colors, each with 3 meters of wire
- EL sequencer, for $35 from SparkFun
- lithium ion battery, 2000 mAh, for $13 from SparkFun
- FTDI basic breakout board, 5V, for $15 from SparkFun
- USB mini-B cable, such as for $2 from SparkFun
- DC-to-AC inverter - 3V, for $10 from SparkFun
- 1 sound detector, for $11 from SparkFun
- 3 stackable header pins; you’ll need to break off 2 that are 5 pins long (1 for EL sequencer, 1 for sound detector) and break off 1 that is 6 pins long (for FTDI BOB ); such as from the 40 break-away, right-angle male header pins for $2 from SparkFun
- 5 female-to-female breadboard wires (or regular wire is fine, too), such as from this pack of 100 F/F 6-inch premium jumper wires for $25 from SparkFun
- (optional) 4 JST connectors for the EL wire, battery and inverter—IF they do not already have connectors; typically, SparkFun products come with connectors; such as a two-wire, black/red JST jumper wire for $1 from SparkFun
- computer with access to the Arduino programming platform; download software from https://www.arduino.cc/en/main/software
- old belt and old pocket from a jacket or pants, to sew together to make a pouch to house the controlling electronics; ideally, obtain a large pocket from a waterproof jacket that is zippered or otherwise sealable to protect the electronics when worn outdoors in potentially wet weather
- article(s) of clothing to decorate, such as shirt, tank top, pants, jacket, leggings, etc.
- 1 needle and strong thread/dental floss OR fabric adhesive
- 1 piece of packing foam or Styrofoam, at least 3 x 3 x 1-inch, to cut to house the sound detector; see Figure 4
- safety goggles, one pair per student
- EL Wire Example Code Handout
Cost note: The estimated expendable cost of ~$21 per group is based on 2 EL wire kits and pins that get soldered onto the boards. The other items are reusable—EL sequencer, FTDI basic, USB cable, etc. Although the soldered pins can be removed, the pins themselves might not be salvageable.
To share with the entire class:
- soldering iron
- epoxy that is waterproof; alternative: non-permanent adhesives such as hot glue and electrical tape
- safety pins
- scissors
- insulating material, to coat all exposed final project connections, such as epoxy, hot glue, electrical tape or other insulating material
Worksheets and Attachments
Visit [www.teachengineering.org/activities/view/spfun-2146-sound-reactive-clothing-arduino-e-textile] to print or download.Pre-Req Knowledge
A familiarity with Arduino coding, basic sewing skills, and a basic understanding of circuits. For the latter, refer to the Circuits lesson.
Introduction/Motivation
Safety is an important part of life. People naturally protect themselves to survive. As humans have advanced, so has technology, which we like to think has improved everyday life, but it has also introduced new dangers. So to save lives, engineers have created new devices to improve safety.
How do engineers keep people safe? (Let students discuss and share their ideas. Possible answers: Seat belts, vehicle brake lights, airbags, self-braking cars, railroad crossing warning gates and lights, protective sports gear, cool-touch light bulbs, etc. If students do not mention them, bring up reflective safety vests.)
Construction workers, cyclists, joggers and others wear reflective vests mainly so they can easily be seen by vehicle drivers. Engineers are constantly improving designs to improve human safety.
In this project, you will act as if you are engineers who believe that reflective vests can be improved upon. You have seen people create light-up costumes that react to sound and think that this is a way to improve reflective vests. However, not all joggers and cyclists own reflective vests, so your team of engineers has decided to add sound-reactive lights to regular clothing. That way, your improvements can be used by more cyclists and joggers, therefore keeping more people safe. Let’s get started!
Procedure
Background
Engineers are constantly improving their designs. Improving and redesigning is a part of the engineering design process, a set of steps that engineers use to help solve problems. Most of the time, improvement takes place after initial testing of new designs. In this activity, students take on the challenge of improving an existing design: reflective vests. Since not all joggers, cyclists and pedestrians who spend time near cars and roadways own reflective vests, students improve upon regular clothing by adding sound-reactive lights.
Electroluminescent wire, called EL wire, is a flexible wire that comes in many different colors. Since it does not heat up, it is ideal for sewing onto fabric and articles of clothing—imagine it being used for fun costumes, bike frame embellishment, and safety improvements like in this activity. For more information on how EL wire works, see the resource links provided in the Additional Multimedia Support section.
Before the Activity
- Gather materials and make copies of the EL Wire Example Code Handout.
- Ask students to bring in articles of clothing that they don’t mind cutting up and attaching EL wire to. Recommend that they bring in at least a shirt, belt and old jacket (or something else with pockets that can be cut out). Alternatively, obtain clothing inexpensively at second-hand and goodwill stores.
- If students are unfamiliar with soldering or if soldering is not a learning objective, then pre-solder the required items as explained in the Wire Devices and Apply to Clothing section below.
With the Students—Project Introduction
- Conduct the pre-activity think-pair-share on the topics of sound and computer programming, as described in the Assessment section.
- Kickoff the activity by presenting to the class the Introduction/Motivation section content.
- Divide the class into student pairs and hand out the fabrication materials. Wait to distribute the handout until later in the activity.
With the Students—Wire Devices and Apply to Clothing
- Have students test the EL sequencer with EL wire, as shown in Figure 1. Do this by connecting the inverter, battery and at least one strand of EL wire to the EL sequencer. Note that the two black wires of the inverter correspond to the AC side. Be sure that the EL wire lights up and blinks when the EL sequencer is powered on battery mode. To ensure the sequencer is in battery mode, you may need to slide the (extremely tiny) switch on the EL sequencer board labeled “Power/USB and BATT” located just in front of the battery input. Instruct students to avoid touching the back of the board while the battery and inverter are in, which may cause tiny shock due to high voltages.

- If having the students solder, then direct them to solder one set of six header pins onto the 5V FTDI pinholes on the EL sequencer; refer to Figure 2. Ensure students remove all components before soldering pins to the board.
- Have students break apart another set of 5 pins to solder onto the VCC, ground, and A2 input pins on the EL sequencer.

- Next, direct groups to solder on a set of header pins to the sound detector, as shown in Figure 3.

- Have students use female-to-female jumper wires to connect the sound detector to the EL sequencer.
- First, connect the sound detector VCC and ground pins to the VCC and ground pins on the EL sequencer.
- Then connect the sound detector gate output (GATE pin) to the A2 input pin on the EL sequencer.
- If using the envelope and/or audio output signals, connect these to pins A3 and A4 on the EL sequencer (more on this in the Add Code section below).
- To prevent jostling or other physical vibrations (such as from collisions) from triggering the sound detectors, direct the teams to use some sort of packing foam to make protective casings for them. One way to do this is to place the sound detector on top of a piece of foam, outline the board with a pen, and cut out a hole in the material into which the detector fits snugly; see Figure 4. It is also recommended to epoxy the wires—but not the sound detector board (!)—onto the foam.
 with header pins connected using female-to-female jumper wires, nestled into a rectangular cut-out in a piece of white packing foam.")
- Have students cut out a pocket from a jacket and sew it onto the belt. See Figures 5 and 6.


- Have students put on the belts, connect the EL wire to the EL sequencer, and place the EL sequencer in the pocket pouch. Have students determine the approximate placement of each EL wire strand based on the location of the electronics, as suggested in Figure 7.
 with its wires protruding out of the pocket.")
- Direct students to assist each other with marking and/or adhering the base of the EL wire JST connector onto clothing so that the full length of the connector can flex. Have students make sure that the JST connector can easily reach the EL sequencer; see Figure 8. Tip: Before adhering the EL wire, use safety pins to determine placement of the EL wire on each article of clothing while wearing it. EL wire is flexible but not stretchy, so leave some slack. It also helps to use separate EL wire strands on different articles of clothing because that makes it a lot easier to take on and off individual pieces of clothing.

- Once all wire locations are marked, have students take off the EL-wire clothing and permanently attach the wires to the clothing (see Figure 9). Starting at the base of the JST connector, attach the strands of EL wire to the articles of clothing. Then either sew the EL wire onto clothing using strong thread or use an appropriate fabric adhesive. Make sure students sew around the wire, to avoid puncturing it.
 and leg (right). On the hip, the sewing starts from the JST connector. On the leg, the wire loops in curves that go around the leg from calf to thigh.")
With the Students—Add Code and Design Product
- Have students retrieve their computers. Then distribute the code handout.
- Direct the pairs to use the USB mini cable and 5V FTDI breakout board to connect the EL sequencer to the computer. Ensure students have flipped the tiny switch on their EL sequencer boards (near the FTDI input from XBEE to FTDI), otherwise the code will not upload correctly!
- Inform students that they are programming the EL sequencer using the Arduino platform. The EL sequencer runs an ATmega328p at 8 MHz and 3.3V. This means that within the Arduino code they need to specify a board, processor and port. The EL Sequencer Hookup Guide linked in the Additional Multimedia Support section details how to connect to the correct board; relevant instructions are below:
Steps to connect to the correct board before uploading Arduino code:
Step 1: Tools > Board > “LilyPad Arduino”
Step 2: Tools > Processor > “ATmega328”
Step 3: Tools > Port > “COM#” (Your COM number will vary; select whichever appears in the drop-down menu. If multiple COMs are listed, upload your code using each COM to see which is suited for your board).
- Next, direct students to determine how they want to use the sound detector output(s) to control the EL wire.
- Remind students that the challenge is to design a sound-activated light-up article(s) of clothing with the purpose to assist in reducing vehicle-people collisions on and near busy roads. Encourage students to be creative with how they want the light to react to sound in order to alert drivers and wearers for safety.
- The example program (on the code handout) uses the gate channel output to turn on the EL wire if a sound is detected.
- This program is just one example of what is possible with the sound detector. Depending on needs, different responses can be achieved by using the “envelope” and “audio” outputs of the sound detector.
- The EL sequencer can individually control up to eight different EL wire strands using the three sound detector output signals, so many possibilities exist to customize sound-activated clothing.
- Give the student engineering teams time to tweak the example code and alter how their outfits react to sound.
With the Students—Test and Finalize Product
- Have students connect all components to the EL sequencer (inverter, battery, sound detector) and then place it in the belt pouch.
- Testing: Direct the teams to turn on the system, make some noise—such as clapping, snapping or music—and verify that the EL wire flashes when it detects sound.
- Once the outfits work as expected, direct the groups to secure all connections by coating them in a (thin) layer of epoxy. Let the epoxy dry for at least 24 hours.
- Conclude with the Safety Show post-activity assessment, as described in the Assessment section.
Vocabulary/Definitions
EL sequencer: A board that contains an Arduino-compatible microcontroller and circuitry for controlling up to eight strands of electroluminescent wire, while also providing the capability to safely switch high-voltage AC on or off.
EL wire: Abbreviation for electroluminescent wire, which is a thin flexible copper wire coated in phosphor that glows when AC current is applied to it, making it look like a thin and flexible neon tube. Unlike LEDs, EL wire is not a series of points but rather an unbroken line of light.
e-textiles: Clothing and accessories that include electrical components like EL wire or LEDs.
Assessment
Pre-Activity Assessment
Think, Pair, Share: Before starting the activity, assess the depth of students’ background knowledge on the topics of sound and computer programing. To the following prompts, have students first think individually, then share in small groups, then as a class.
- What do you know about the science of sound? (Possible student responses: Sound is vibration that travels in wave form through a medium and is heard when it reaches a person’s ears; sound requires a medium to travel in, such as a solid, liquid or gas, so no sound exists in space; noise is different than sound because it subjective, it is based on opinion.)
- What do you know about computer programming? (Possible student responses: Computer programming is taking commands that humans understand and transforming them into a language that computers understand in order to carry out specific commands; computers require binary code [code in ones and zeros] and people use programs to put commands into binary language.)
Activity Embedded Assessment
Group Work: Observe student pairs as they work. Make sure that each group member is contributing, which includes assisting with the wiring and sewing, and relaying instructions. Encourage students to switch who takes the lead role for different project stages.
Post-Activity Assessment
Safety Show: Have each group show off its design to the rest of the class, explaining how its sound-activated light-up article(s) of clothing is(are) intended to assist in reducing vehicle-people collisions on and near busy roads. (Possible explanations: Makes people more visible to cars, lights-up as cars go by in response to car noise, etc.). To conclude, lead a class discussion with the following prompts:
- Which of the team ideas demonstrated do you like the most? Which seemed the most feasible to you? What improvements come to mind? Which design solutions might be combined to make them even better? Who are the targeted audiences for each product? Would you buy any of them?
- What are other ways that engineers might improve the safety of people who are walking or jogging near roadways and parking lots? Any wild ideas? (Possible ideas: Light-up pet harness, light-up “crossing the street” flags for pedestrians, light-up walkways, etc.).
Investigating Questions
Why do we place the sound detector in Styrofoam? (Answer: The purpose of the packing foam is to insulate the detector so as to prevent contact and short circuits, and prevent electrical interference.)
Safety Issues
- Although it is low current, EL wire runs on high-voltage AC (100 VAC). The EL sequencer board has exposed connections, so be careful when handling it. Always double (and triple) check that the power switch is OFF before touching any part of the board. For final projects, it is recommended to coat all exposed connections in epoxy, hot glue, electrical tape or other insulating material.
- Watch that students are careful when using soldering irons and hot glue guns.
Troubleshooting Tips
Epoxy is a permanent adhesive. So if you want to reuse any of the components, use alternate adhesives—like hot glue or electrical tape—that are less secure, but adjustable and removable.
Reduce the overall strain on individual connections by securely fastening wires to the belt and/or pouch at a distance of approximately one inch from every connection. The goal is to give the EL wire enough slack to flex while also keeping the electrical connections rigid since they are the most likely point of breakage.
Activity Extensions
Have students continue using EL wire to make their choice of three easy EL wire projects described on this blog: neon sign, light-up hat and light-up backpack. These easy, DIY projects (with good photos and instructions) do not require soldering or wire strippers, just EL wire, EL inverter battery pack and craft supplies.
Activity Scaling
For lower grades, pre-solder all required components (as explained in the Wire Devices and Apply to Clothing section). Assist students with sewing and the use of epoxy.
Additional Multimedia Support
- Getting Started with EL Wire: https://learn.sparkfun.com/tutorials/getting-started-with-electroluminescent-el-wire
- EL Sequencer Hookup Guide: https://learn.sparkfun.com/tutorials/el-sequencerescudo-dos-hookup-guide
- Sound Detector Hookup Guide: https://learn.sparkfun.com/tutorials/sound-detector-hookup-guide
- LiPo Battery Care (handling lithium polymer batteries): https://www.sparkfun.com/tutorials/241?_ga=2.10821172.1216980708.1498433278-1851750875.1497308858
Subscribe
Get the inside scoop on all things TeachEngineering such as new site features, curriculum updates, video releases, and more by signing up for our newsletter!More Curriculum Like This

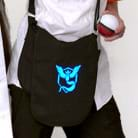
Working as if they are engineering teams, students create safety products that kids would want to wear while playing Pokémon Go in the dark. They create electroluminescent (EL) patches that they adhere onto clothing, backpacks and more. They cut Pokémon character stencils out of iron-on cloth patche...
Students are introduced to the technology of flexible circuits, some applications and the photolithography fabrication process. They are challenged to determine if the fabrication process results in a change in the circuit dimensions since, as circuits get smaller and smaller (nano-circuits), this c...

References
This activity was adapted from SparkFun’s Sound Reactive EL Wire Costume by Jenfoxbot at https://learn.sparkfun.com/tutorials/sound-reactive-el-wire-costume
Copyright
© 2017 by Regents of the University of Colorado; original © 2016 SparkFun EducationContributors
Jen Foxbot; Kent Kurashima; Sabina Schill; Rachel SharpeSupporting Program
SparkFun EducationLast modified: September 14, 2018
User Comments & Tips